Preparation is Key to a Successful Small Polytunnel Build
- polytunnelsrusweb
- May 15, 2025
- 3 min read
Updated: Apr 17

Polytunnel construction companies provide the necessary skill sets and expert fitters for polytunnel installations. These services are perhaps more appropriate for large and multiple commercial builds than on small polytunnels, often used in garden or domestic cultivation spaces, where keen or give-it-a-go growers want to produce their intended plants or crops.
We briefly outline the simplistic ground preparation and build of small polytunnels and the installation reason why, small polytunnel constructions can be put up in a day.
1. Location Preparation
Before the polytunnel arrives, ensure the area is ready: Remove debris, weeds, and unwanted objects from the soil. If necessary, trim trees or shrubs that may damage the cover or obstruct the structure's location. Level the soil and treat it, as crucial to produce healthy and abundant crops or plants.
Natural windbreaks such as walls, hedges, and garden fences, will protect the polytunnel installation and covering from harsh winds.
2. Instructions-Tools- Equipment-Checks
The equipment list will depend on factors such as various ways, small polytunnels can be secured.
a) Spade or hole diggers
b) String, pegs, tape measure, hammer, and a level
c) Spanners or socket sets for assembling the frame
d) Staple gun, nails or ties for securing the plastic covering
e) Ladders if required for pulling the cover over the frame
f) Tools are accessible and in good condition
3. Check and Inspect Your Polytunnel Installation Kit
Always double-check the contents to ensure everything is included and in the right amount, and there are no missing parts or damaged fixings. Read instructions carefully, twice if necessary and familiarise yourself with the step-by-step process.
4. Choose a Calm Day
Pouring rain or wind can make it difficult to prepare and prove more frustrating or damaging when trying to pull the covering in position, it must be kept taut to secure the cover and the frame structure, especially when on your own!
The Build Steps
On preparing the sire and ensuring everything is ready, follow these simple steps for a seamless and smooth polytunnel installation:
1. Mark Out the Site
Accurately mark out the frame size dimensions of your small polytunnel, always check measurements (twice), and ensure hole placings or anchor points are positioned correctly. This ensures that the frame will be properly aligned during the polytunnel construction and is placed to receive the best amount of sun possible.
2. Assemble the Frame
Assemble the frame, starting with the hoop structure and ridge pole. This can typically be done by connecting metal or PVC tubing. Secure the frame with appropriate clips, fasteners, ties or brackets, and check to ensure each section is securely connected.
3. Add Bracing if Required
Added stability may be required on larger or more complex polytunnel constructions, especially in areas, prone to high winds and no shelter locations. Diagonal brace bars between the hoops, maintain integrity and stability.
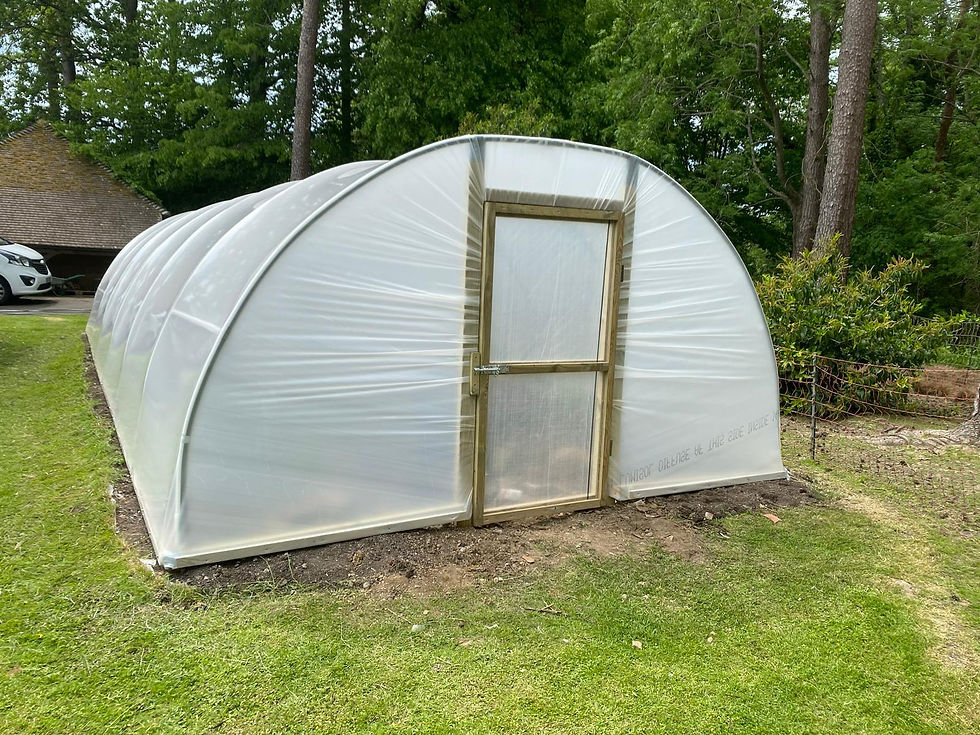
4. Fit the Covering
The most crucial step in the polytunnel installation is fitting the polythene covering. Roll the material gently over the frame to avoid snagging and to ensure it is evenly distributed. It's essential to keep taut when tensioning to avoid wrinkles or gaps, thus preventing damage from the surrounding elements. Secure it with ties, fastenings trenching or whichever way you keep it taut. Use hot-spot tape on the frame to protect areas where the frame touches the covering to reduce wear and tear from sun heat on the metal frame.
5. Secure the Structure
Anchor or secure the small polytunnel construction to the ground using whichever method you prefer. This could involve digging holes, using ground pegs, setting concrete anchors, attaching to base rails or using ballast weights to hold the structure down.
Professional Polytunnel Construction Help and DIY Options
While small polytunnels are often built by garden enthusiasts with some DIY skills, larger or more complex, polytunnel installations, can require professional assistance.
Go online at www. polytunnelsrus.co.uk for helpful advice or assistance. We offer free, no-obligation quotes for local small polytunnels and on large commercial and multi-build projects. We can help guide you on the type of polytunnel construction and selection of materials, coverings or methods, best suited to your specific location and growing needs.


Comments